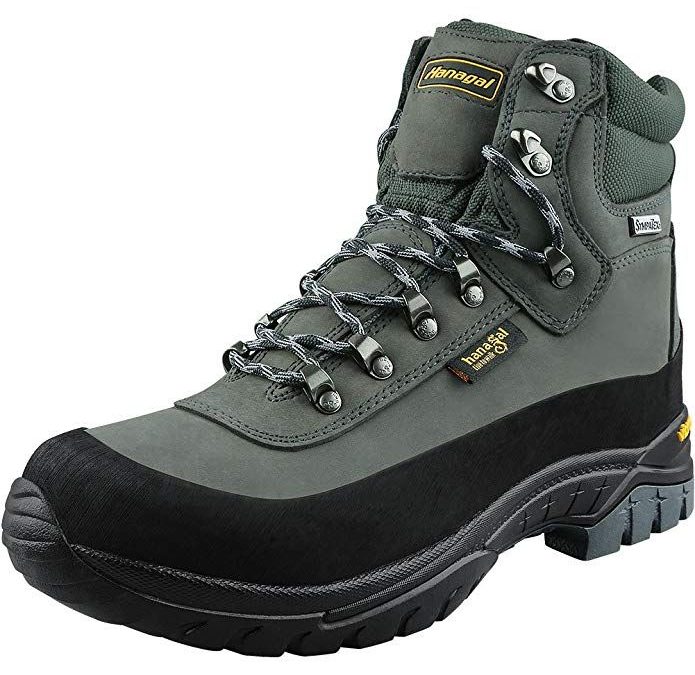
Rain sneaks. Puddles jump. Streams look small and then splash big.
A boot can use tough leather and fancy membranes, yet one tiny seam can whisper, “Come in, water.”
Good news: with smart seam construction, you can block ingress and keep air moving.
Simple talk ahead. Real tricks inside.
Where water attacks first
It crawls through needle holes.
It rides capillary wicks along the thread.
It pools at tongue gaps and eye-stay corners.
Down at the rand line, flex opens micro paths.
So, we design seams that refuse those paths while letting sweat escape.
Strategy 1: Inside bootie + outside style
Use a full waterproof bootie (a thin microporous or hydrophilic film shaped like a sock) stitched to the lining.
Then build your pretty upper on top.
If an outer seam gets wet, the bootie still blocks.
Breathability survives because vapor can pass through the film and out the upper, slow but steady.
Tip: keep bootie seams away from toe bend; put them on calmer panels for long life.
Strategy 2: Pattern placement is half the battle
Move the outer seams up and back.
Avoid seam lines across the toe flex and the vamp center where splash hits.
Shift joints to the quarter or collar where water pressure is lower.
Long curves shed better than sharp corners; pooled drops love corners.
Strategy 3: Stitch types, counts, and holes
Fewer holes = fewer doors.
For shell joins, a lockstitch 301 with 8–10 SPI is a good start.
On heavy leathers, go slightly longer to keep holes apart.
Chainstitch can add comfort in flex zones but doubles needle holes; use only where needed.
Always pilot on scrap and do a 30-minute wick test before green-lighting production.
Strategy 4: Threads that don’t drink
Pick anti-wick polyester thread.
The special finish lowers surface wetting, so water beads and slips instead of climbing the yarn.
Match the thread to the fabric family (polyester sewing thread or polyester embroidery thread with polyester fabric) to support end-of-life recycling later.
Use the smallest ticket that still meets strength; thinner yarn makes smaller holes.
Needle: micro-point for textiles, round/tri for thick leather, size up only if skip occurs.
Strategy 5: Seal what you sew
Once stitching is done, stick a seam-sealing tape to the lining side.
Heat-activate, then cool-clamp 2–3 seconds so memory locks.
At difficult cross-overs, use small patch tapes to cover the “X.”
Where tape can’t reach (tight toe cups), brush water-based seam sealer sparingly.
No heavy solvent clouds, thank you.
Strategy 6: Tongue that doesn’t gulp
Make a gusseted tongue that climbs high—ideally near the second top eyelet.
Bellows folds should face upstream so the splash doesn’t drive inside.
Add a tiny drip rail stitch line on the vamp to turn water away.
Tongue foam wants perforations for vapor, but keep a thin film baffle under the lace zone to stop needle-hole leaks there.
Strategy 7: Rand and foxing, the splash shield
Wrap a rubber or PU rand around the lower.
Bond the upper-to-rand seam with hot-melt film matched to the upper’s polymer.
This blocks lateral splash and protects stitches from abrasion.
Feather the rand edge so it doesn’t create a rigid hinge that cracks after miles.
Strategy 8: Lasting and bottom construction
Board lasting with a sealed strobel line gives a stable, tape-friendly floor.
If you choose a strobel lasting, tape the strobel seam fully and use a full in-sock to guard screw holes from lasting tacks.
Direct-attach midsoles can be very watertight, but mind mold vents; seal any stitch paths that cross the feather line.
Strategy 9: Breathability boosters (above the waterline)
Put vent zones high on the quarter and collar where splash won’t sit.
Use spacer mesh on the lining to create an air gap; moisture moves faster.
Pick foams that don’t soak like sponges; perforate where skin runs hot.
Remember: breathability is a network—vapor needs exits away from puddles.
Two quick build recipes
Light hiker (fast, breathable):
Textile upper + thin PU film overlays, anti-wick thread, 301 lockstitch 9 SPI, full bootie, 13 mm gusset height, hot-melt seam tape, rand to 12 mm above feather, spacer mesh lining. Passes 30 min puddle, dries fast.
Alpine boot (storm tough):
Nubuck + molded guards, thicker ticket thread only at stress points, otherwise slim; bootie with taped cross-overs, high bellows tongue, extended rand, board lasted, extra patch tape at heel foxing. Passes 60 min dunk, breathability moderate but reliable.
Field tests that tell the truth
- Puddle stand: 30–60 minutes, water to the rand line; check socks.
- Flex-soak: 20,000 bends while toes dipped; look for weeps at vamp seam.
- Wick strip: Dip a stitched sample 10 mm in dyed water; measure the climb after 30 minutes.
- Steam-out: Warm boot, weigh, then dry with air movement; track dry-back time for breathability signal.
Common oops & fast fixes
| Symptom | Likely cause | Quick fix |
| Damp at the big toe | Seam on high-pressure flex | Move seam; longer SPI; add inner patch tape |
| Wet lace channel | Low gusset or needle leaks | Raise gusset; add film baffle; seal eye-stay run |
| Halo wet around stitches | Wicking thread / big needle | Switch anti-wick; drop needle size; relax tension |
| Tape lift after wash | Under-clamp | Add cool-clamp 2–3 s; verify tape compatibility |
Care words for the hangtag
“Brush mud off. Dry in shade. Re-proof upper DWR sometimes. Don’t bake by the heater. Check tongue gusset sits straight before lacing.”
Small habits keep big storms out.
Wrap, tight like a heel lock
Waterproof boots are all about the seams—where are they placed, how are they stitched, what is used for sealing them, and how do you guide water away while giving sweat a path out.
Balance is the craft: defend the low zones, vent the high ones, and make tiny holes act small.
Do that, and your hikers stay dry on the inside, alive on the climb, and happy mile after mile.


