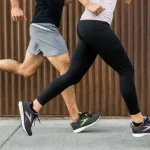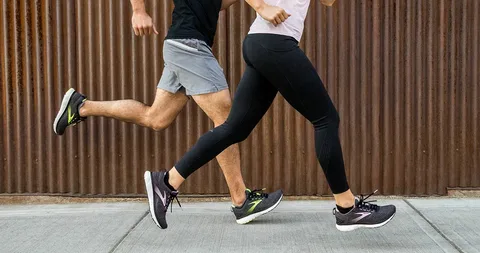
Fast shoes should feel light.
And they should bend like your foot, again and again, without crying.
Seems to decide a lot of that story.
Where the seam walks, the shoe either breathes happily or breaks early.
Good news: we can plan the seam path so that weight drops and flex life climbs.
Simple words ahead. Real tricks inside.
Start with the foot map
Feet don’t bend in straight lines.
They roll, twist, splay.
So the first job is to trace flex roads: ball-of-foot arc, big-toe line, lateral toe spring, and the midfoot twist bar.
Take a marker. Put lines on a sock. Walk, jump, cut.
Now keep your major seams away from those hot roads.
If you must cross, cross once, at a gentle angle, with a long radius, not a sharp corner.
Long curves beat short corners
Corners are stress magnets.
They collect cracks and glue peel.
Use sweeping curves for eyestay ends, vamp points, and collar notches.
A 6–10 mm radius can double seam life compared to a hard 90°.
Curves also let you use fewer stitches per centimeter, which means fewer holes, which means less weight and less chance of a tear.
Fewer parts = fewer grams
Every panel edge needs seam allowance, thread, tape, and sometimes glue.
Cut one panel and you lose two allowances and a line of thread (bonded nylon thread or nylon sewing thread).
So combine small overlays into one flowing piece, or replace them with printed or bonded films where the load is low.
Save the stitched seams for places that truly carry force—like lace rows and heel lock.
Put stitches in compression, not in peel
When the shoe flexes, a seam can feel peeling (like opening a sticker) or shearing (sliding).
Peel kills fast. Shear lives longer.
Aim seems to flex pushes layers together.
Example: rotate the forefoot toe-cap seam a few degrees so it rides with the crease, not against it.
Small angle, big life.
Choose the stitch class for the job
- Lockstitch (301): small hole count, clean look. Good for high-pressure areas and thin knits.
- Chainstitch (401): elastic feel, great at hems and places you want a little give. Don’t double rows over the main flex line.
- Zigzag / coverstitch allows the load to spread wide; perfect for knit uppers and collars.
Keep SPI mid-range. Too many holes add weight and start tears; too few look lazy and slip.
Thread that helps, not hurts
Use fine ticket thread wherever strength allows; thin yarn = small holes.
Pick a thread that matches the polymer family of the upper, so recycling later is simpler.
In wet zones (toe splash, rand line), choose an anti-wick finish so water doesn’t climb along the seam.
At high-rub spots (eyestay top, heel notch), step one ticket size up or add a tiny bar-tack—but only there. Don’t overbuild the whole path.
Bond when you can, sew when you must
Modern athletic uppers love sew-bond hybrids.
A narrow heat-activated film can hold most of the load, and a short seam locks the edge.
Less thread, less bulk, smoother flex.
Bonus: no solvents make the room smell nicer and cut grams of glue.
Use stress pictures, not guesses
You don’t need fancy gear.
A simple marker grid and slow-motion phone video show where the fabric stretches most.
For digital teams, run a 3-D twin of the upper with a foot last: color map turns red where strain peaks.
Now the route seems through blue-green land, not red.
Save red for smooth, unbroken material or for bonded reinforcements.
Inside secrets that add life
- Move the strobel seam slightly medial so the main forefoot crease lands on clean material.
- Keep lace-row seams parallel and away from the tongue flex fold; add small relief notches under the lace bridge.
- At the heel, align the back seam with the calcaneus centerline, then curve it above the collar so it doesn’t fight Achilles motion.
- At the end, taper the edge into a feather so it doesn’t make a hinge that cracks the upper.
Lightweight checklist (pinned by the machine)
- Combine panels; remove one seam this week.
- Swap to a finer ticket thread on low-stress runs.
- Drop SPI by 1 where tests allow; re-check pull.
- Replace one stitched overlay with bonded film.
- Round every external corner to ≥6 mm radius.
- Shift any seam that sits right on the forefoot crease by 3–5 mm.
Do these six and grams fall without drama?
Test like you mean it
- Flex drum: 50 k cycles at the target angle; watch for yarn breaks and edge whitening.
- Tear-start strip: nick the seam edge 2 mm and pull; good paths resist running tears.
- Water wick dip: for 30 min, toe seam 10 mm in dyed water; measure climb (lower is better).
- On-foot AB test: tape one shoe’s seam with a felt strip; if comfort rises, the seam was placed incorrectly.
Common oops & quick cures
| Symptom | Likely cause | Fast fix |
| Seam crack at vamp | Corner too sharp / sits on crease | Add 8 mm radius, move 4 mm off the crease |
| Stitch popping on sprint | SPI high + big needle | Reduce SPI, smaller needle, finer thread |
| Ripple near eyestay | Path too straight across curved zone | Arc the seam; cut ease notches in allowance |
| Heel rub | Back seam fights Achilles | Shift seam or open S-curve above collar |
Don’t forget to breathe
Seam tape and films can block air if you place them low and wide.
Push vent zones higher on quarters, away from splash, and keep seams off those vents.
Use spacer mesh under the tongue so vapor can leave even when laces are tight.
Light and dry feels faster than light and swampy.
Small pilot, big win
Pick one trainer.
Redraw the vamp and eyestay path with two fewer corners and one fewer panel.
Drop thread one ticket on side runs, keep a strong ticket for bar-tacks.
Swap one overlay for bonded film.
Build 40 pairs.
Flex, run, bend.
If life improves and grams drop, lock the spec and roll it to your next colorway.
Wrap, quick like a sprint finish
Seam-path optimization is quite a design.
No billboard, just better miles.
Curve more, cross less, sew smarter, bond where you can, and keep stitches away from the foot’s red zones.
You will feel it—lighter pickup, softer flex, longer life.
That’s how a thin line of stitches makes a shoe run like the wind and last like a friend.